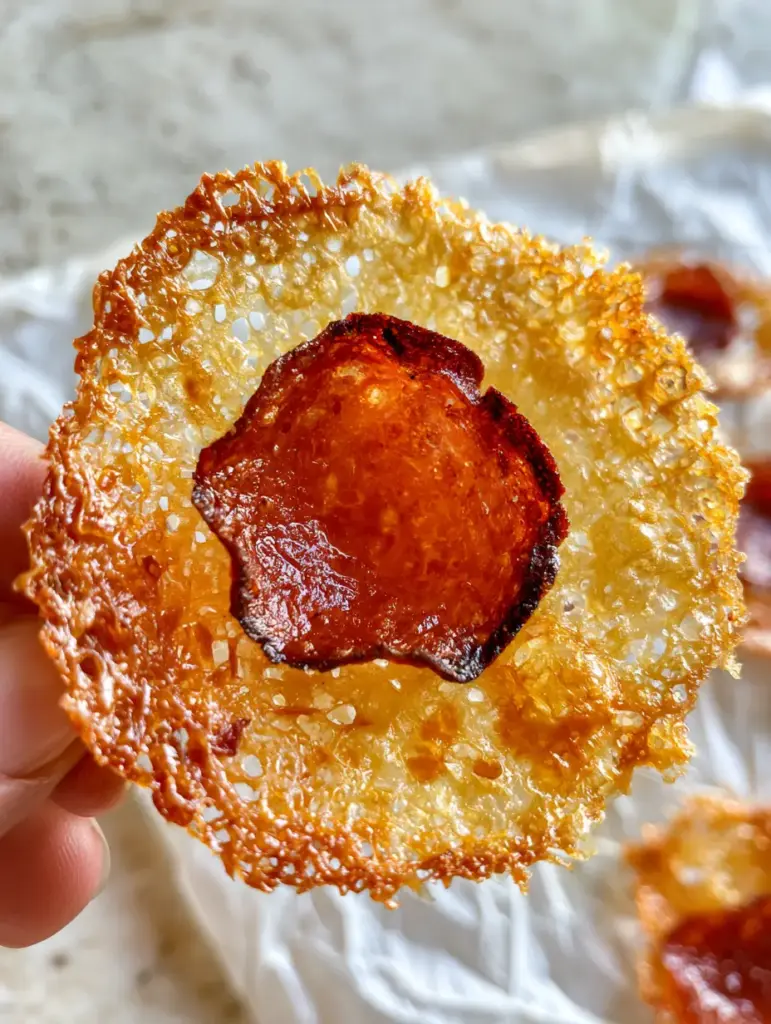
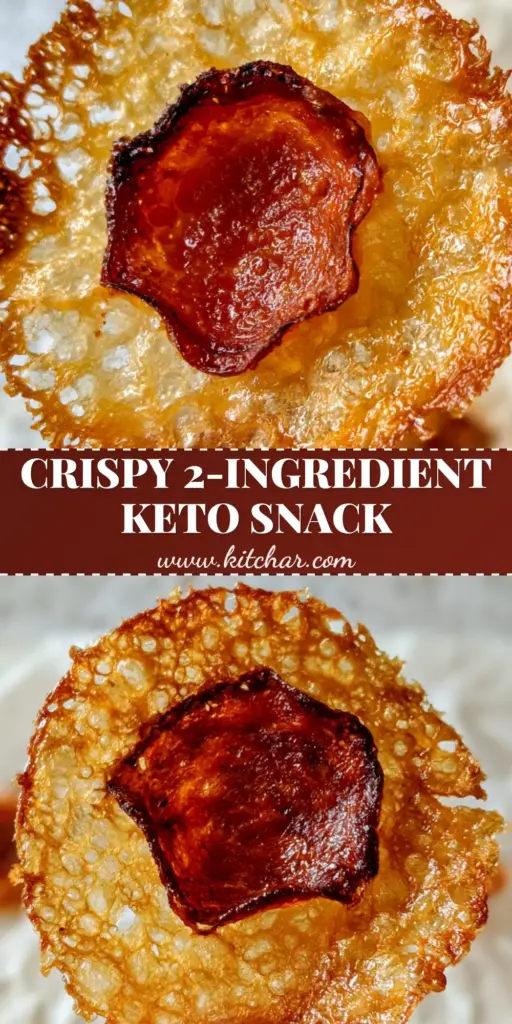
If you have been searching for the ultimate low-carb crunch, these Pepperoni Cheese Crisps are about to become your new kitchen obsession. Imagine a snack that combines the savory, salty punch of a pepperoni pizza with the delicate, shatteringly crisp texture of a gourmet frico. These aren’t just snacks; they are a culinary masterclass in texture, featuring a translucent, golden-brown toasted parmesan disc with a delicate honeycomb texture that defies gravity.
Every bite delivers a symphony of sensory cues, from the visible glistening natural oils to the aromatic cracked black pepper flecks that cut through the richness of the cheese. The centerpiece of each crisp is a single, slightly cupped, crispy pepperoni slice with charred, dark red edges that provide a smoky depth. Whether you are hosting a party or just need a savory midday pick-me-up, these crisps offer a professional-grade appetizer experience with minimal effort.
Why You Will Crave These Perfectly Circular Parmesan Delights
- Structural Integrity: The delicate honeycomb edges provide a professional lacy detail that looks like it came from a high-end bistro.
- The Perfect Char: By specifically timing the render, we achieve slightly cupped pepperoni slices with dark red, crispy edges that provide a smoky contrast.
- Sensory Explosion: Soft morning light highlights the glistening savory oils and the airy, crunchy structure that melts on your tongue.
- Naturally Low-Carb: A keto-friendly powerhouse that fits perfectly alongside other favorites like savory pizza bowls.
Essential Elements for the Perfect Lacy Crunch
Finely Grated Parmigiano-Reggiano (2 cups / 200g): The quality of your cheese is the single most important factor for achieving that translucent, golden-brown honeycomb texture. Avoid the pre-shredded bags found in the grocery aisle, as the added cellulose (anti-caking agents) prevents the cheese from melting into a cohesive, lacy disc.
Thinly Sliced Pepperoni (24 slices / 60g): You want high-quality, deli-style pepperoni that is thin enough to cup under high heat. This cupping action traps the glistening natural oils, concentrating the flavor into the center of the crisp.
Freshly Cracked Black Pepper (1 tsp / 2g): These flecks are not just for flavor; they provide the visual contrast against the golden cheese. The coarse grind ensures that you get a burst of floral heat in every bite to balance the saltiness.
High-Heat Cooking Oil Spray (Optional): While the cheese and pepperoni release plenty of fats, a light mist of avocado oil on the parchment can sometimes assist in a cleaner release if your parmesan is particularly lean.
The Professional Toolkit for Crispy Success
To achieve the macro-level detail seen in our Pepperoni Cheese Crisps, you need a few specific tools. A large, heavy-duty rimmed baking sheet is essential for even heat distribution, preventing hot spots that might burn the delicate edges before the center is set.
Crumpled white parchment paper is your best friend here. While silicone mats are great, parchment paper actually helps absorb a tiny fraction of the excess oil, leading to a crispier, less greasy bottom. You will also need a fine microplane or grater to ensure the cheese is light and airy before it hits the pan.
Mastering the Art of the Golden-Brown Honeycomb
Preparation and Mounding Strategy
Preheat your oven to 400°F (200°C) to ensure the heat is intense enough to immediately begin rendering the fats. Line your baking sheet with a fresh sheet of parchment paper, slightly crumpling it first and then smoothing it out to create a textured surface that prevents the crisps from sliding.
Using a tablespoon, scoop the finely grated parmesan into 12 small mounds, spaced at least 2 inches (5cm) apart. This spacing is critical because as the cheese melts, it will spread out to form that iconic lacy, translucent disc. Lightly pat the mounds down so they are even in height, ensuring a uniform cook time.
The Pepperoni Placement and Seasoning
Place a single slice of pepperoni directly in the center of each parmesan mound. Press it down very gently so it makes contact with the cheese base. This ensures that as the cheese liquifies, it “grabs” the pepperoni, fusing them into a single unit.
Finish each mound with a generous pinch of cracked black pepper flecks. The pepper should be visible against the white cheese, promising a bold flavor profile once toasted. If you enjoy a bit of variety, you might consider how these flavor profiles work within sophisticated appetizer platters.
The Baking and Rendering Phase
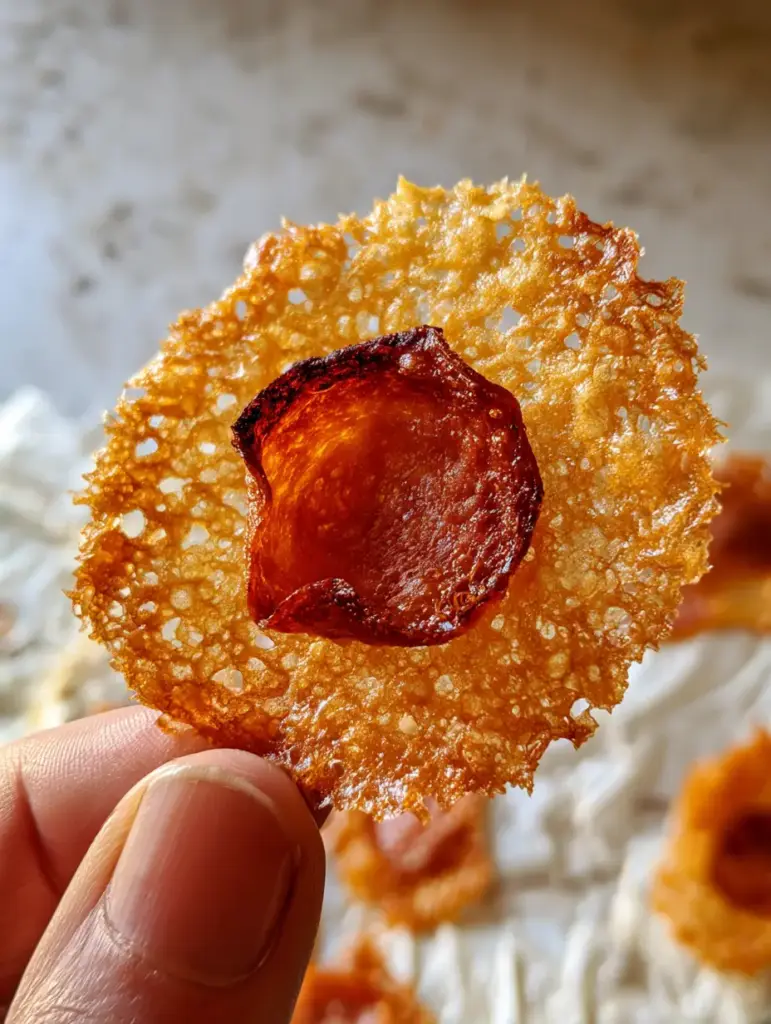
Slide the baking sheet into the center rack of the oven. Watch closely through the oven window; within 3 to 5 minutes, you will see the cheese begin to bubble and form a honeycomb texture as the moisture evaporates. The edges will start to turn a light golden brown and become frilled.
Continue baking for another 2 to 3 minutes until the pepperoni slices begin to cup upward and the edges of the meat show a distinct dark red char. You are looking for the “glistening” stage where the oils are active but the cheese hasn’t turned dark brown, which would indicate bitterness.
The Critical Cooling Window
Remove the tray from the oven and let it sit for at least 5 minutes. This is the hardest part, but it is the most essential. As the Pepperoni Cheese Crisps cool, the molten fat solidifies, and the airy structure hardens into a rigid, crunchy wafer.
Once cooled, use a thin offset spatula to lift the crisps. They should be perfectly circular and hold their shape between two fingers without bending. The final result should look exactly like a macro photo: a lacy, golden-brown marvel with a savory, charred center.
Expert Tips for the Ultimate Flavor Profile
- The Moisture Factor: If your cheese is too fresh (high moisture), it may not crisp up. If this happens, blot the top of the crisps with a paper towel halfway through baking.
- Uniformity is Key: Use a circular biscuit cutter as a guide when mounding the cheese to ensure every crisp is perfectly circular.
- Pepperoni Selection: Use “old world” pepperoni for the best cupping action; the natural casing causes the edges to curl beautifully under heat.
- Flavor Variations: For a spicy kick, add a tiny pinch of red pepper flakes alongside the black pepper.
Maintaining the Crunch: Storage and Reheating
These Pepperoni Cheese Crisps are best enjoyed within an hour of baking to experience the maximum “snap.” However, you can store them in an airtight container at room temperature for up to 2 days. To prevent them from sticking or becoming soft, place a piece of parchment paper between each layer.
If they do lose their crunch, do not use the microwave. Instead, pop them back into a 350°F (175°C) oven for 2 minutes. This will re-render the oils and restore that delicate, frilled edge texture. We do not recommend freezing these, as the delicate honeycomb structure is too fragile for the expansion of ice crystals.
Innovative Ways to Serve Your Crisps
While these are incredible on their own, they also serve as a fantastic gluten-free “cracker” for various dips. They pair exceptionally well with the creamy textures found in savory goat cheese preparations or as a garnish for a hearty chicken parmesan dish.
For a complete lunch experience, serve them alongside a crisp green salad or even use them as a “crouton” for a bowl of tomato bisque. If you’re looking for more snack inspiration, these crisps are a natural companion to stuffed mini peppers, creating a beautiful texture contrast on an appetizer board.
Frequently Asked Questions
Yes, they are exceptionally keto-friendly! They are almost zero carb, consisting entirely of protein and healthy fats from the high-quality cheese and pepperoni.
Hard cheeses like Parmesan, Pecorino Romano, or aged Cheddar work best. Soft cheeses have too much moisture and will not form the delicate, airy honeycomb structure required for a true crisp.
The ‘cupping’ effect is a result of the temperature differential between the top and bottom of the slice. Using a thin-sliced, natural casing pepperoni and baking at a high heat (400°F) ensures those dark red, crispy edges.
While the glistening oils are part of the visual appeal and flavor, you can lightly blot them with a paper towel if they are too greasy. However, letting them cool on parchment usually allows the right amount of oil to reabsorb for maximum crunch.
Chewy crisps usually result from using pre-shredded cheese containing cellulose or not baking them long enough to fully render the fats. Ensure you grate your own parmesan and wait until the edges are golden-brown and frilled.
The Ultimate Pepperoni Cheese Crisps Recipe
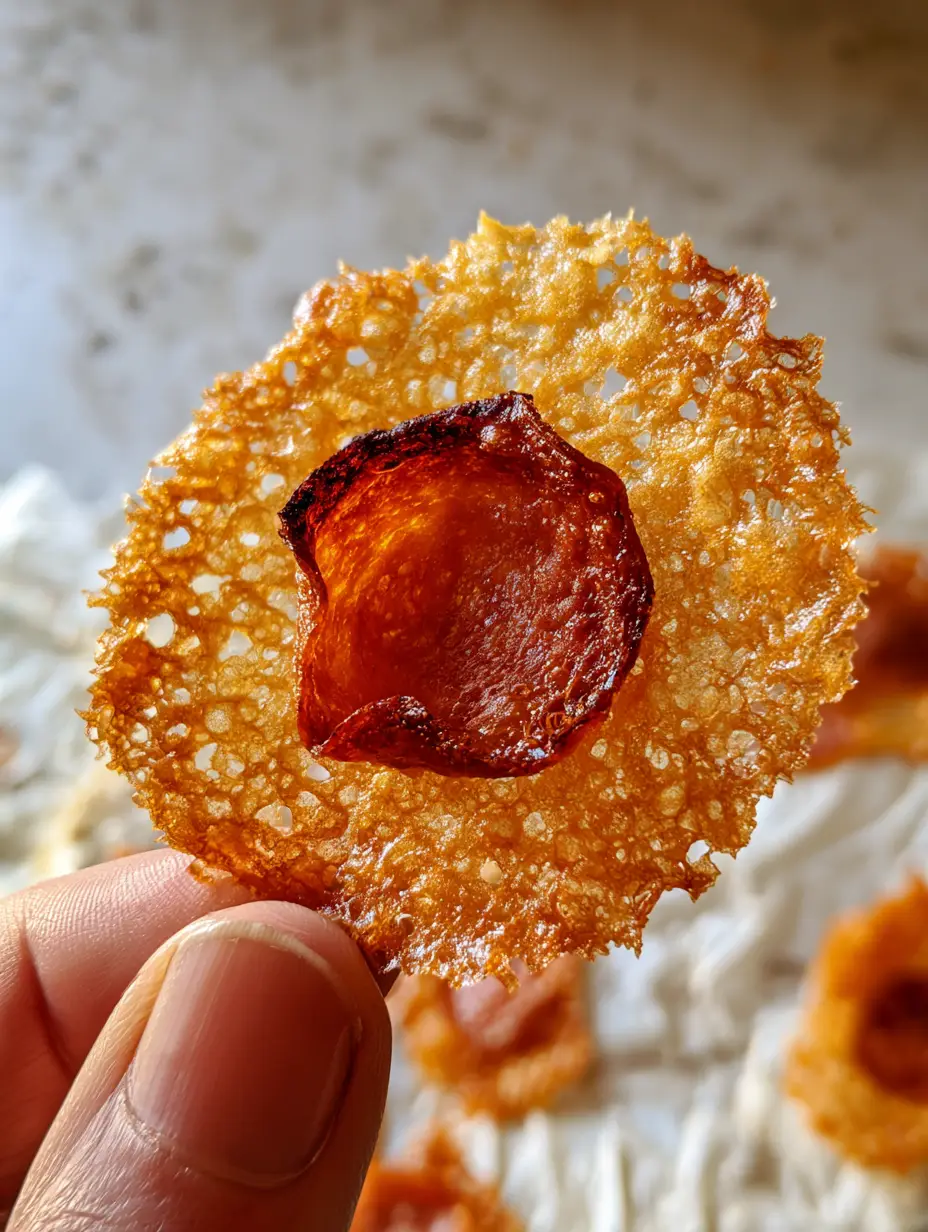
Pepperoni Cheese Crisps: The Secret to Ultra-Lacy, Two-Ingredient Keto Snacks
Ingredients
Equipment
Method
- Preheat oven to 400°F (200°C). Line a baking sheet with crumpled white parchment paper.
- Place 1 tbsp (approx 15g) mounds of grated parmesan on the parchment, spaced 2 inches apart.
- Top each mound with a pepperoni slice and cracked black pepper. Press lightly.
- Bake for 6-8 minutes until edges are golden-brown and lacy, and pepperoni is charred and cupped.
- Cool on the pan for 5 minutes until the honeycomb structure is firm and crispy.
Notes
Watch the oven closely in the last 2 minutes to prevent the delicate frilled edges from burning.
Closing & Call to Action
Mastering the Pepperoni Cheese Crisps is a rite of passage for any home cook looking to elevate their snack game. The combination of the lacy, honeycomb parmesan and the charred, savory pepperoni creates a flavor profile that is both nostalgic and sophisticated. These crisps prove that you don’t need a long list of ingredients to create something truly spectacular.
Did your crisps achieve that perfect golden-brown frill? We want to hear about it! Leave a comment below with your results, and don’t forget to follow us on Pinterest for more visually stunning recipe inspiration. Share your photos and tag us—nothing makes us happier than seeing your culinary triumphs!