garlic chili green beans are the ultimate side dish for anyone craving a restaurant-quality experience in under 20 minutes. These aren’t your average soggy steamed beans; we are talking about high-heat, blistered perfection that rivals the best Szechuan takeout. If you have been searching for a way to make vegetables the star of the show, this glossy, spicy, and umami-packed recipe is your new secret weapon.
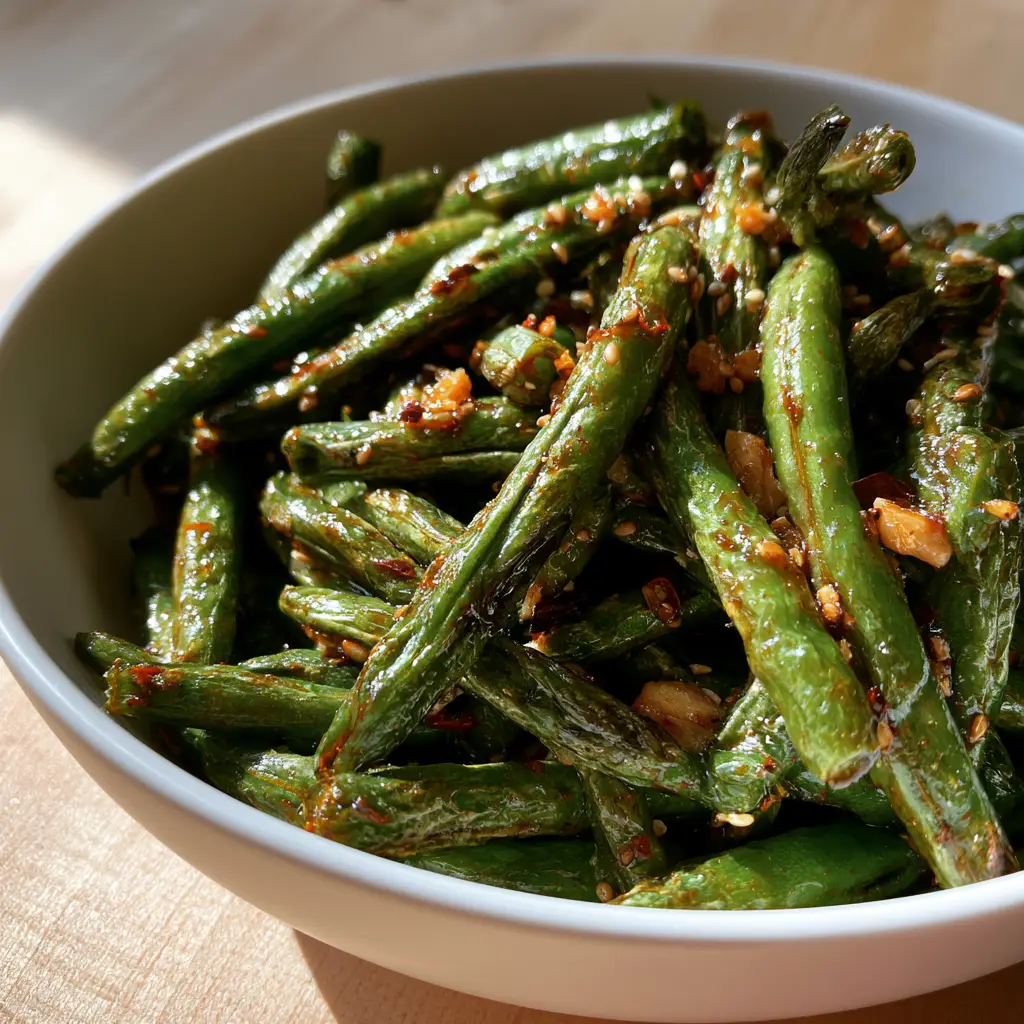
The magic of these garlic chili green beans lies in the contrast of textures. You get that signature “snap” from the fresh bean, paired with the smoky depth of charred skins and the crunch of golden-brown toasted garlic bits. One look at the vibrant green beans coated in a shimmering red chili oil glaze, and you’ll know why this recipe is currently exploding across Pinterest boards everywhere.
Why You Will Obsess Over These Blistered Green Beans
- The Perfect Char: We use a dry-frying technique to achieve authentic “leopard-spotting” and blistered skin textures without overcooking the interior.
- Glossy Umami Glaze: A curated blend of red chili oil and soy sauce creates a thin, high-shine finish that clings to every bean.
- Textural Harmony: Every bite features a mix of soft sesame seeds, crispy garlic bits, and the heat of dried red chili flakes.
- Pinterest-Ready Aesthetic: Served in a shallow white ceramic bowl, the contrast of the green beans against the red oil is visually stunning and perfect for your next dinner party.
If you enjoy this bold flavor profile, you might also love our garlic butter sautéed green beans or our famous crack green beans for your next meal prep session. These dishes are all designed to maximize flavor with minimal effort.
Must-Have Ingredients for Spicy Garlic Beans
To achieve the specific look and taste of these garlic chili green beans, you need ingredients that can stand up to high heat while providing layers of flavor. Do not skip the drying process for the beans, as moisture is the enemy of the blister!
- Fresh Green Beans: 1 lb (450g) of fresh, snapped beans. Look for vibrant color and a firm snap. Avoid frozen beans for this specific texture.
- Neutral High-Smoke Point Oil: 2 tbsp (30ml) of avocado or grapeseed oil to facilitate that intense sear.
- Fresh Garlic: 5-6 cloves (approx. 30g), minced finely. These will become the golden-brown “bits” that decorate the dish.
- Red Chili Oil: 2-3 tbsp (30-45ml) for the glossy finish and foundational heat.
- Dried Red Chili Flakes: 1 tsp (2g) for added spice and visual red specks.
- White Sesame Seeds: 1 tbsp (9g) for a nutty crunch and a beautiful light dusting.
- Soy Sauce: 1 tsp (5ml) to provide a hit of salt and deep umami coloring.
- Sea Salt: A pinch to taste, to elevate the natural sweetness of the beans.
The Science of the Perfect Blister: Step-by-Step
Creating world-class garlic chili green beans requires more than just tossing things in a pan. It requires heat management and timing. Follow these steps to ensure your beans look exactly like the hero shot in our recipe ideas gallery.
Step 1: Prep and Total Dryness
Wash your 1 lb (450g) of green beans and trim the ends. Crucially, you must pat them completely dry with a kitchen towel. If the beans are wet, they will steam instead of searing, and you will miss out on that beautiful charred skin.
Step 2: The High-Heat Sear (Dry-Frying)
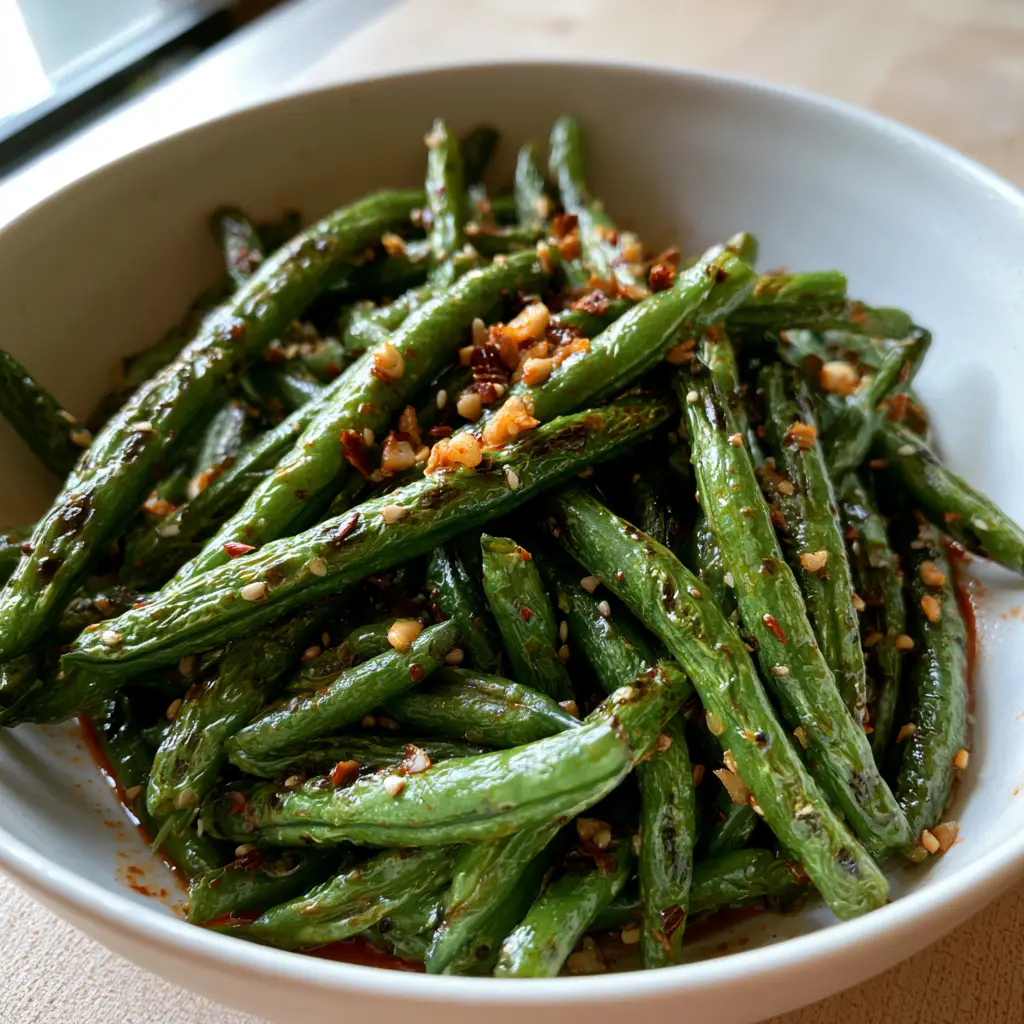
Heat your 2 tbsp (30ml) of neutral oil in a large skillet or wok over medium-high heat until it begins to shimmer. Add the beans in a single layer if possible. Let them sit undisturbed for 2-3 minutes. You want to hear a loud sizzle; this is the sound of the garlic chili green beans developing their “leopard spots.”
Step 3: Achieving Leopard-Spotting
Toss the beans and continue cooking for another 4-5 minutes. Look for the skin to pucker and turn a dark, charred brown in spots while the rest of the bean remains a vibrant, bright green. The contrast of the blistered green beans against the white ceramic bowl later will be stunning.
Step 4: The Aromatic Infusion
Push the beans to the edges of the pan, creating a well in the center. Add your minced garlic and dried red chili flakes into that center space. Toast them for 30-60 seconds until the garlic turns a perfect golden-brown. Do not let it turn black, as burnt garlic is bitter.
Step 5: The Glossy Chili Oil Glaze
Pour the red chili oil and soy sauce over the beans. Toss everything together rapidly. The oil will coat the charred skins, creating a thin, glossy red chili oil glaze that glistens under soft, side-lit natural daylight. This is what gives the dish its “hero” status.
Step 6: The Final Garnish
Remove from heat immediately. Sprinkle with the 1 tbsp (9g) of white sesame seeds. The seeds should stick to the glossy finish, creating the textured look seen in our professional food photography. Transfer to a shallow white ceramic bowl for serving.
Expert Tips for the Ultimate Snap and Char
1. Don’t Crowd the Pan: If you are doubling the recipe, cook in batches. Overcrowding leads to moisture buildup, which prevents the garlic chili green beans from blistering properly.
2. Room Temperature Beans: If your beans are ice-cold from the fridge, they will drop the pan temperature instantly. Let them sit out for 10 minutes before cooking for a better sear.
3. Use a Wok if Possible: The high sloped sides of a wok allow for better moisture evaporation and easier tossing of the blistered green beans.
4. Control the Heat: If your garlic is browning too fast, pull the pan off the heat for a few seconds. Residual heat is enough to finish the glaze without scorching the aromatics.
For more high-flavor, low-carb sides, check out our garlic butter green beans and mushrooms or see how these pair with a hearty bowl of white chicken chili.
Storage, Reheating, and Meal Prep
While garlic chili green beans are best served fresh to maintain their snap, they do make excellent leftovers. Store them in an airtight container in the refrigerator for up to 4 days.
To reheat, avoid the microwave if you want to keep the texture. Instead, flash-fry them in a hot skillet with a tiny drop of oil for 1-2 minutes. This will revive the glossy finish and keep the beans from becoming mushy. We do not recommend freezing this dish, as the cell structure of the bean breaks down, losing that signature blistered texture.
What to Serve with Garlic Chili Green Beans
These beans are incredibly versatile. They serve as a vibrant, spicy counterpoint to creamy dishes or grilled proteins. Here are a few favorite pairings:
- Asian-Inspired Feast: Serve alongside orange chicken, ginger beef, or steamed jasmine rice.
- Protein Power: These beans are the perfect side for our slow cooker chicken shawarma or a simple seared salmon.
- Soup and Salad: Balance the heat with a cooling avocado deviled egg or a bowl of tomato basil soup.
Frequently Asked Questions
For the best results and authentic blistered texture, fresh green beans are highly recommended. Frozen beans contain too much moisture, which causes them to steam rather than sear.
You can control the heat by reducing the amount of dried red chili flakes and using a mild chili oil instead of a hot variety.
To make this recipe gluten-free, simply swap the soy sauce for tamari or coconut aminos.
Any high-quality red chili oil works, but those with plenty of ‘sediment’ (chili bits) at the bottom provide the best flavor and visual appeal.
This usually happens if the pan isn’t hot enough or if the beans were still wet when added to the oil. Ensure the beans are bone-dry and the oil is shimmering before cooking.
The Best Garlic Chili Green Beans Recipe
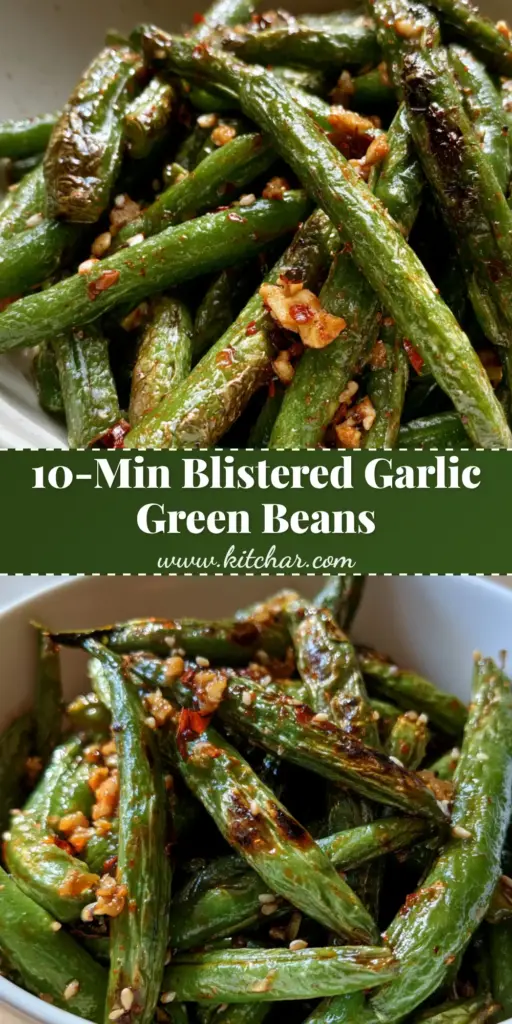
garlic chili green beans with Blistered Skins and Toasted Garlic
Ingredients
Equipment
Method
- Wash the green beans and pat them completely dry with a towel to ensure a proper sear.
- Heat oil in a wok over medium-high heat. Add beans and sear for 7-8 minutes until blistered and charred with leopard spots.
- Push beans to the side, add garlic and chili flakes to the center. Toast until golden brown.
- Pour in chili oil and soy sauce, toss to coat, and garnish with sesame seeds.
Notes
Use high heat to achieve charred skin without mushiness.
Save, Share, and Rate!
Did these garlic chili green beans hit the spot? If you loved the charred texture and the spicy garlic kick, please save this recipe to your Pinterest boards using the button below! It helps others find this spicy goodness.
We love seeing your kitchen wins. Tag @kit_char on Pinterest or leave a comment below with a photo of your blistered beans. Don’t forget to give this recipe a 5-star rating if it’s going into your permanent rotation. Happy cooking!