No Bake Granola Bars are the holy grail of meal-prep snacks, offering a perfect balance of wholesome fiber and indulgent texture. If you have ever struggled with homemade bars that crumble into a pile of loose oats the moment you touch them, this recipe is your solution. We are focusing on a specific culinary architecture that ensures a dense, chewy interior with a clean snap, just like the professional versions you see in high-end health food boutiques.
The secret lies in the precise ratio of binders to solids and the mechanical process of pressing the mixture. By following this guide, you will achieve a glossy, golden-brown sheen that highlights the natural beauty of thick-rolled oats and creamy peanut butter. This isn’t just a snack; it’s a scientifically backed method to create the perfect portable fuel for your busy lifestyle.
The Science of the Perfect Chewy Texture
Achieving a professional-grade consistency in No Bake Granola Bars requires understanding the interplay between fats and sugars. When we combine creamy natural peanut butter with liquid clover honey, we aren’t just mixing flavors; we are creating a sticky matrix. This matrix acts as a culinary glue that coats every single oat flake, preventing the “dry crumble” effect common in inferior recipes.
Unlike baked versions that rely on egg proteins or caramelized sugars to set, these bars utilize the cooling properties of natural fats. As the peanut butter and honey mixture returns to room temperature and then chills, it solidifies into a semi-firm state. This results in that satisfying, dense bite that holds its shape even when you snap a bar in half by hand.
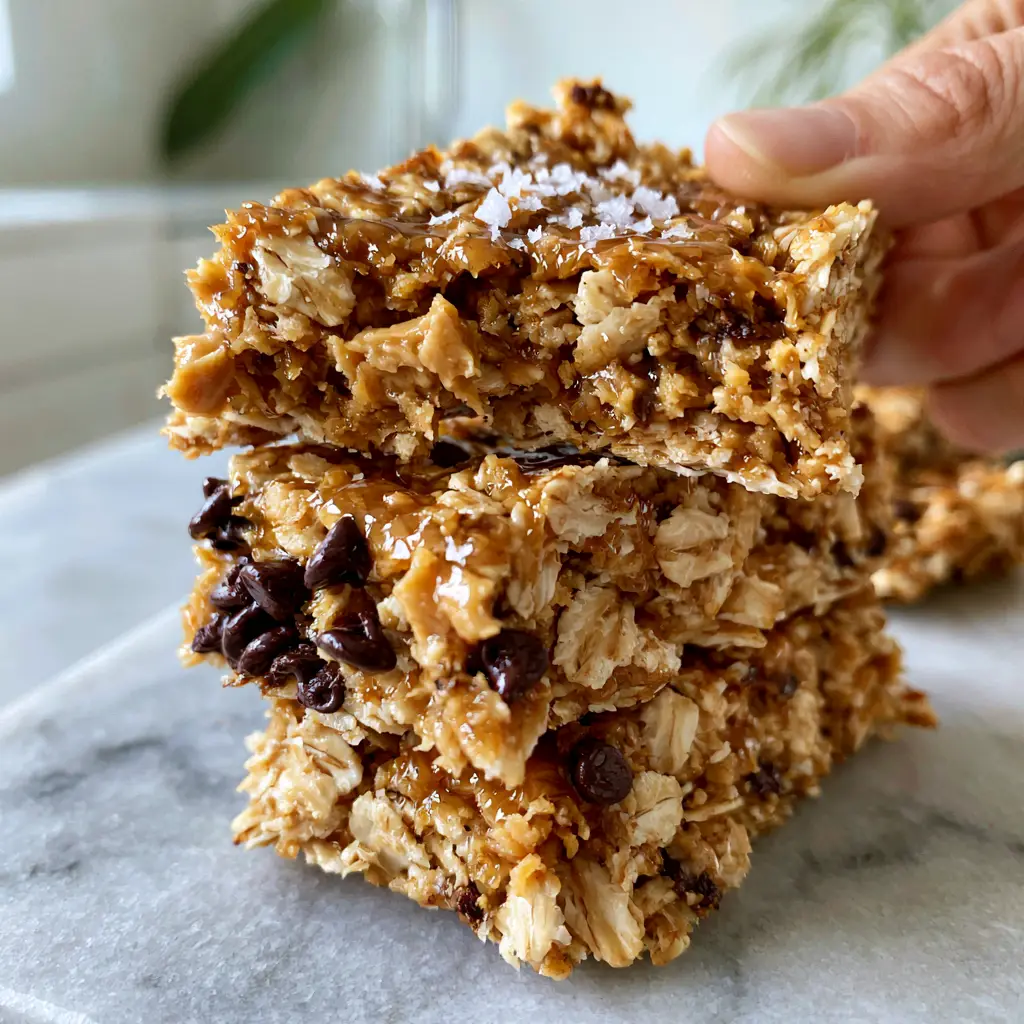
Visual Cues for Recipe Excellence
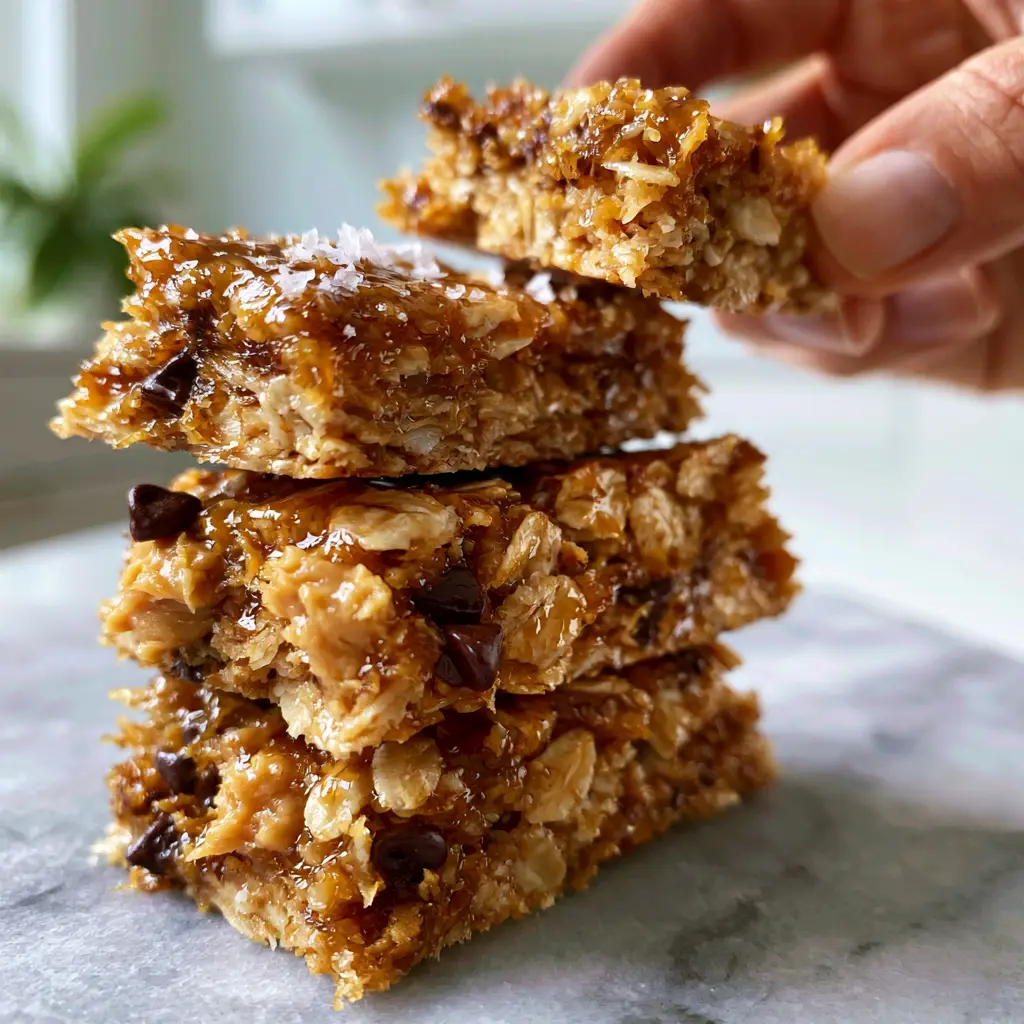
- The Glossy Glaze: Look for a vibrant, golden-brown sheen on the oats, indicating the honey and peanut butter have fully emulsified.
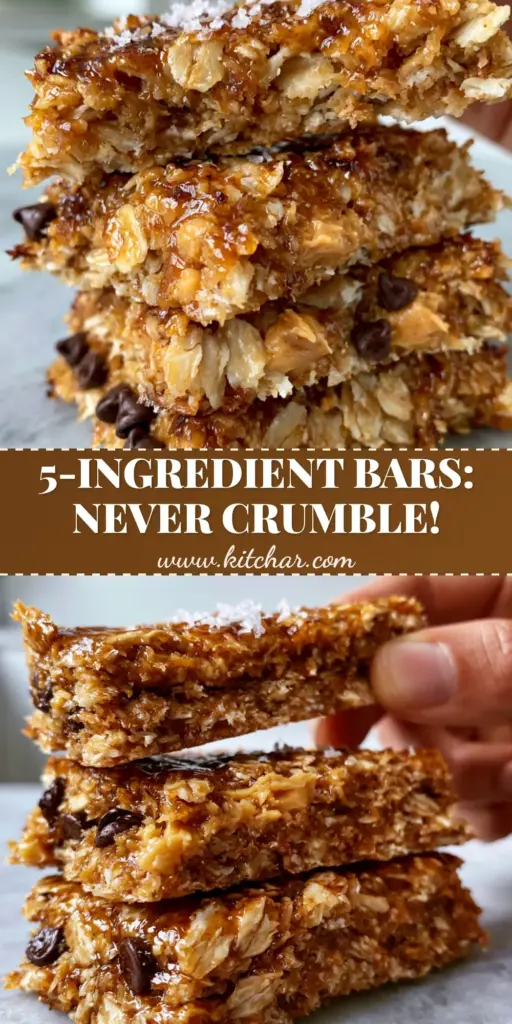
- Structural Integrity: The bars should be thick and rectangular, showing a dense interior with zero loose crumbs falling away when broken.
- Embedded Texture: Mini semi-sweet chocolate chips should remain distinct and scattered throughout, rather than melting into a muddy swirl.
- The Finishing Touch: A visible sprinkle of flaky sea salt on the surface provides a sharp contrast to the rich, sweet binders.
Essential Ingredients for Structural Success
3 cups (270g) Thick-Rolled Old Fashioned Oats: These provide the necessary bulk and chewy texture; avoid quick oats as they turn mushy and lose the distinct “whole grain” look described in our visual blueprint.
1 cup (250g) Creamy Natural Peanut Butter: The oils in natural peanut butter provide the ideal viscosity for a smooth, glossy binder that doesn’t feel waxy or overly stiff.
1/2 cup (170g) Liquid Clover Honey: This specific honey variety offers a mild floral note and a superior “tackiness” that ensures the oats stay pressed together firmly.
1/2 cup (90g) Mini Semi-Sweet Chocolate Chips: Using mini chips allows for better distribution throughout the dense oat matrix, ensuring a bit of chocolate in every single bite without compromising the bar’s structure.
1 tsp (5ml) Pure Vanilla Extract: This foundational “invisible” ingredient bridges the gap between the salty peanut butter and the sweet honey, deepening the overall flavor profile.
1/4 tsp (1.5g) Fine Sea Salt: Integrated into the base to balance the sugars and enhance the natural nuttiness of the toasted oats.
1 tbsp (15g) Flaky Sea Salt: Reserved strictly for the topping to provide that crucial visual sparkle and a burst of flavor that cuts through the richness.
1 tbsp (15ml) Refined Coconut Oil: A professional secret that adds a beautiful sheen to the final bars and helps them set firmly in the refrigerator.
Foundational Tools for Precision Pressing
To achieve the “thick and rectangular” look of these No Bake Granola Bars, your equipment is just as important as your ingredients. You will need an 8×8 inch (20x20cm) square baking pan, which provides the perfect depth for thick bars. Lining this pan with parchment paper is non-negotiable, as it allows you to lift the entire block out for clean, sharp-edged slicing.
Additionally, a heavy-bottomed glass or a flat-surfaced measuring cup is essential for the “pressing” phase. The more pressure you apply to the mixture while it is still warm and pliable, the better the bars will hold together. Professional chefs often use a second pan of the same size to apply even weight across the entire surface.
Mastering the No-Bake Technique
Step 1: Preparing the Sticky Matrix
In a medium saucepan over low heat, combine the creamy peanut butter, liquid clover honey, and coconut oil. Stir constantly with a silicone spatula until the mixture is completely smooth and starts to show a glossy, golden-brown sheen. Do not let it boil, as overheating the honey can make the final bars too hard; you simply want it liquid enough to coat the oats effortlessly.
Step 2: Incorporating the Textural Elements
Remove the saucepan from the heat and immediately stir in the vanilla extract and fine sea salt. Add the thick-rolled oats to the pot, folding them gently until every single oat is glistening with the honey-peanut butter glaze. Allow the mixture to cool for about 5 minutes before folding in the mini chocolate chips; this prevents the chips from melting completely, keeping them visible in the sides of the bars.
Step 3: The Critical Pressing Phase
Transfer the mixture into your prepared 8×8 inch (20x20cm) pan, spreading it to the corners with a spatula. Use the bottom of a heavy glass or a flat measuring cup to press down with significant force. You are aiming for a compressed, dense interior with no air pockets, which ensures the bars stay intact when snapped. Sprinkle the flaky sea salt over the top while the surface is still slightly tacky.
Step 4: The Cold Set
Place the pan in the refrigerator for at least 2 hours, or ideally overnight. This chilling period allows the fats to solidify and the oats to hydrate slightly, resulting in a perfectly chewy texture. Once chilled, lift the parchment paper out of the pan and use a sharp chef’s knife to cut the block into thick, rectangular bars.
Expert Tips for Success
- Temperature Control: If your peanut butter is cold from the fridge, you must warm it thoroughly with the honey to ensure a seamless emulsion.
- Toast the Oats: For a deeper flavor, toast the rolled oats in a 350°F (175°C) oven for 10 minutes before mixing; just ensure they cool slightly so they don’t melt the chocolate chips instantly.
- Clean Slicing: Wipe your knife with a warm, damp cloth between every cut to maintain the sharp, professional edges seen in the photos.
- Binder Balance: If your mixture feels too dry, add an extra tablespoon of honey; if it’s too oily, toss in another handful of oats.
Structural Troubleshooting
If your No Bake Granola Bars are falling apart, it usually points to one of two issues: insufficient binder or insufficient pressure. Ensure you are using “natural” peanut butter that is runny rather than the stiff, no-stir varieties. Furthermore, don’t be afraid to really lean into the pressing step; the more you compress the oats, the more structural integrity the final bar will have.
For those looking for a different texture profile, you might enjoy exploring our Paleo Lemon Bars for a citrusy treat or perhaps a savory Sushi Bake for a unique meal prep alternative. If you are serving these as part of a larger brunch spread, they pair beautifully with a light Spinach Salad with Eggs.
What to Serve With Your Granola Bars
These bars are incredibly dense and rich, making them a fantastic companion to lighter, fresher fare. For a high-protein breakfast, serve a bar alongside a bowl of Greek yogurt topped with berries. If you’re packing these for a lunch box, they provide a great energy boost after a Simple Spinach Salad.
For a more comprehensive weekend meal prep, consider making these alongside our Paleo Banana Bread Muffins or a batch of Baked Smashed Potatoes for the week ahead. The versatility of these bars makes them the perfect “closer” for any nutritious meal.
Frequently Asked Questions
You can, but honey is a much stronger binder due to its viscosity. If using maple syrup, you may need to boil it slightly to reduce the water content, or the bars will be much softer and more prone to crumbling.
Yes, because these bars rely on the cooling of natural fats (peanut butter and coconut oil) to maintain their structure, they should be stored in the refrigerator. They will soften significantly at room temperature.
Stored in an airtight container in the refrigerator, these bars will stay fresh and chewy for up to 2 weeks. You can also freeze them for up to 3 months for longer storage.
This usually happens due to insufficient pressure during the pressing phase or not enough binder (honey/peanut butter). Ensure you press the mixture firmly into the pan and chill for at least 2 hours to let the fats set.
Recipe for Professional No Bake Granola Bars
No Bake Granola Bars: The Ultimate Thick and Chewy Guide
Ingredients
Equipment
Method
- In a medium saucepan over low heat, combine peanut butter, honey, and coconut oil. Stir until smooth and glossy.
- Remove from heat and stir in vanilla extract and fine sea salt.
- Fold in the rolled oats until fully coated. Let cool for 5 minutes, then stir in mini chocolate chips.
- Transfer to a parchment-lined 8x8 pan. Press very firmly with a flat-bottomed cup until dense and even.
- Sprinkle with flaky sea salt and refrigerate for at least 2 hours until firm.
- Lift from the pan and slice into 12 thick rectangular bars using a sharp knife.
Notes
Press the mixture as hard as you can to ensure the bars don't crumble when cut.
Closing & Call to Action
Mastering these No Bake Granola Bars is a game-changer for anyone looking for a reliable, delicious, and visually stunning snack. With their glossy honey glaze and perfect chewy snap, they are sure to become a staple in your kitchen. The combination of salty peanut butter and sweet chocolate chips creates a flavor profile that appeals to both kids and adults alike.
If you enjoyed this recipe, please leave a comment below and let us know how your bars turned out! Don’t forget to follow us on Pinterest for more culinary inspiration and share your creations by tagging us. Happy no-baking!